Let's begin with the "Add As You Go MD Squares" in this post and I'll make a second posting for the "Plan Ahead MD Strips" method so it will be easier to find in the archives.
So you've finished your first square....
 (To get this striped effect work the simple square by changing colors on every odd row. Cast on with MC work rows 1&2 change to CC work rows 3&4, change to MC work rows 5&6...etc do NOT cut yarn at changes.)
Now you are ready to set the stage for square number 2.
With MC using a knitted on cast make 11 new stitches.
Work square number 2 using Rows 1 - 18 of the Simple Single Square pattern.
At the end of Row 18, using a knitted cast on, cast on 11 more stitches and work another square!
Continue doing this for as many squares as your heart desires. End with Row 18, Knit 1, turn, Sl 1, bind off all stitches.
Neatness Tip:
For the sake of being tidy, and not having a quarter inch floating thread of the CC, on the wrong side of the work, after you have knit the first 11 stitches of row 1, wrap the CC around the next stitch before you work the YO, K1,YO of the row. Don't work the stitch with the CC yarn, just wrap it. You can wrap around any way you wish, the photos below are taken from the wrong side, but you can wrap from the front it doesn't matter.
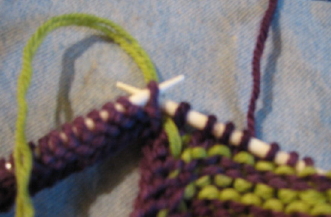 This photo taken from the wrong side, shows the CC yarn back and the needles are poised to slip the stitch that is on the left needle.
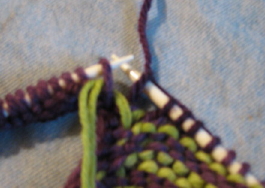 The stitch has been slipped the CC yarn brought forward and the slipped stitch has been returned to the left needle.
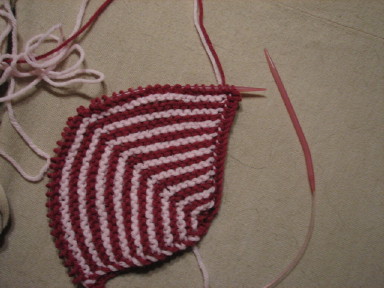
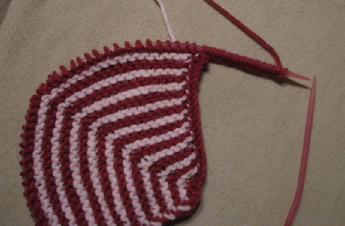
Here is a photo of the "Add As You Go" strip.
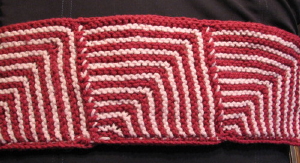
The advantages to the AAYG method are that you can just pick up your sticks and yarn and start making a strip of squares. You needn't be concerned if you have enough yarn for 8 squares or 9 squares, work as many as you can and call it done when you run out! :-) Absolutely no math involved at all unless you consider counting your cast ons math! :-) And of course, the greatest advantage of all.....only 4 ends....ever....no matter how many squares long you make your strip!!!
The disadvantage of this method is that the bottom edge isn't as smooth and neat as I like. I have a solution for this but that will come with it's own post. Another pitfall of this method is that it might be difficult to maintain an even tension in your cast on edge and your bind off edge. These tension anomalies make the squaring up of the squares imperfect....that bugs me.
**Disclaimer, yes for those eagle eyes out there. The squares in the photos ARE larger than a square worked with the stitch count called for the Simple Single Square pattern. In the SSS pattern the square is worked 10 stitches wide, and 10 stitches tall with a center stitch. The squares in the pics are 20sts x 20 sts with a center stitch. (41 stitches for the initial cast on and 21 stitches cast on to set the stage for each AAYG square. Using a 20 x 20 square in worsted wt. with # 7 needle I get a 6.25" square...nice width for a scarf don't you think?
No comments:
Post a Comment