Showing posts with label MD Knitting. Show all posts

Monday, November 05, 2007

Coriolis

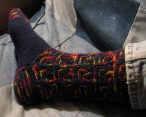
As promised, but of course a day late, the Coriolis sock from Cat Bordhi's New Path Ways for Sock Knitters.


Tech Stuff:
Yarn: Moda Dea Sassy Stripes
#4 needles

Comments:
Numero uno comment is obviously, I love this pattern and adore the book. I tried a reinforced heel on these, not thrilled with it. Personally I don't see the purpose of it. I don't ever have a problem with the heel wearing out on my socks and I don't like the way it feels. I won't be doing this heel again.

I did swirl the other sock in the opposite direction, but I think more pix would be kind of silly.

I've got tons of yarn left over. I used two balls and have nearly an entire ball worth left. I've used this yarn before and I don't remember having this much yarn left over. Maybe I only used one ball for the other pairs, but that doesn't sound right. Oh well, Sillian likes those little anklet/no cuff socks, guess I'll use the leftovers for a pair of those.

These are the second pair of this pattern I've made so far, not counting the baby sock size. I've never wanted to take pix of them cuz,
1) they looks sooooo goofy just laying there and I was afraid people would shy away from the pattern.
2) It's not easy taking pix of sock when you're wearing them.

See how weird they look just laying there?


I've toyed with the thought of getting or making some sock blockers for quite some time, but that idea was waaaay down towards the bottom of my list of things to do. I'm mean really, I'm not a dedicated sock knitter, I usually only churn out plain no frills socks. Socks to me are just a convenient small knit on the go type thing. So what would be the point of showing off something so ordinary and spending the time and/or $$ on sock blockers. On the other hand since I got my copy of Cat's book, and I've been making my way through all the different "sockitectures" the wantoned desire of a sock blocker has been piqued. The patterns in the book are fabulous but when photographed just lying there, well let's be frank, some of them look as if they were made for a feet not of the human size, shape and proportions. Then, a couple of weeks ago, at the SpinIn I found this:


Oh yeah!!!! There was whole box of them for $3.00 each! I considered of course buying two, but alas this was the only knee high leg in the tangle of limbs. Plus it matches my foot and leg measurements perfectly. Oh how could I possibly pass this baby up?? The new "sockitectures" will photograph well, plus it adds an air of completion to my workroom space. I have several body pieces and parts. I've spoke of my girls before, Vivian, Selma, and Chloe, my dressforms, I also have four heads, 6 hanging half torsos, a hand and now a leg. I'm feeling almost Frankensteinish complete, but as creepy as it all is, I'm thrilled.

And now just for giggles. Remember the socks I knitted for Joe for the Oktoberfest? I said I thought they'd be thigh highs on me...what do you think? :o)


Thursday, January 25, 2007

MD Felted Bag

I decided the other day to play around with MD knitting and felting*. I used the same MD squares that I've posted about before but worked them using stockinette st. I rationalized that the stitch/row differences could for all practical purposes be tamed by felting. I remember reading in many places on the web and having some experience that items generally felt more in one direction than the other (although I don't remember which way that actually is, nor do I even now! lol). I was hoping that this uneven felting would take care of the st/row discrepancies. Plus the fact that I was going to be felting this by hand I would have better control------remember my washer is not felting friendly.....sigh.

Thus began the knitting:


I used one entire ball of Lion Brand 100% wool blue, and about 2/3 of a ball of pink. This piece was, as I said, made using the same manner of the MD squares I've posted about before. I used # 10ish needles and 12 stitches per side in stockinette.

Then I seamed it. A quickie whip stitch, nothing fancy.


The plan was to put the handles on the outer peaks and a magnetic closure on the center peak, creating a not too deep but longish bag, on the small side for sock knitting and such. Then I felted it.


Don't you just LOVE my kitchen sink!?! Gillian calls it the bathtub in the kitchen, but I couldn't love it more. For anyone interested I'll include the sink spec below.

....back to fiber stuff..... I prepared for a work out but the felting time was really only 10 minutes!! (hmmmm not bad, I think I might make some FT clogs for me and felt them by hand)

All things considered I like the shape of the original bag, but I wasn't pleased with the proportions (sorry no photo). So I cut out the seams I had made and re-seamed it into this bag:


I'm liking it. Next time, and there WILL be a next time I'll work the squares so they'll run up and down, like they did in the original design (see pre-felted photo). It's a nice size "bucket" bag. I know this pic is crummy, but I'm prob'ly not going to spend anymore time on this bag. I'm not planning on lining it, nor even bothering to put straps on it. It's really not up to my standard of bothering to finish, but it's a grrrreat proto-type! :-) I'll prob'ly use it as a project basket, just fold and tack the upper points down and ta da it's a basket!

The kitchen sink specs:
I LOVE LOVE LOVE my kitchen sink!!!!
It is a single basin that measures 42 x 24 and is 8 inches deep.
It is made of Terrazzo Marble. Think of those mosaic-like/chip marble floors you see in really old schools and that's what it is. My sink is in the green colorway, which means that the color of the marble chips span the spectrum from nearly black to the palest touch of green you can imagine. Those chips are then tumbled into a mixture of white portland cement and the sink is molded into one piece. It weighs a ton. OK I'm exaggerating but the it does weigh over 400 pounds.....nearly a quarter ton! :-P

Oy the trouble of getting it here out in the middle of nowhere plus installing it!!! OMG another Crazy Lady story to tell someday. Suffice to say, it took two trucks, a semi, and another beast of a truck, a fork lift, a farm tractor and 6 men not counting drivers and operators to get the sink into it's final resting place. Joe has since stopped cursing and it's only been two years so I guess it wasn't that bad! LOL

* felting vs fulling....I'm not going there. I know there's a difference, exactly what, I don't care. So I have, and prob'ly always will, use the word felting in regard to many types of wool manipulation that involves the meshing/tangling/and so forth of tiny wool fibers to create a cohesive no-warp, non-raveling fabric. :-)


Thursday, November 30, 2006

Joys of the Provo* Cast On

To continue.....

In the last few posts I showed you how to work a simple square, then two methods that could be used to make a continuous strip of squares (aka a scarf). Within those posts I pointed out the inherent troubles with working squares with either of these two methods, the uneven edges, the tedium of casting on a bazillion stitches, etc. Today's post, IMHO takes all those woes and throws them out the window! (Of course there are troubles with this method too...isn't there always???...but it's a problem that leads to MUCH neater edges, and throws open the doors of possibilities....so I guess it's not so much a problem huh. :-)

The simple solution is the almighty PROVISIONAL CAST ON.

There are several ways to do a provisional cast on, I prefer the method that uses a length of waste yarn and to make your stitches you sort of work a figure 8 around it. The crocheted chain method is a good one, and doesn't look as sloppy as the figure 8 method, but hey...I like to keep things simple as possible....I hate fiddly things and one way to use the crochet chain cast on is, well, a bit like picking up stitches and takes more time, and ya know, sometimes I'm just too dang lazy to get up off my butt and get a crochet hook!! Don't know about you, but when I want to start something I want to start it and not spend a lot of fumbling time in the set-up stage!

Here are a few links to get you familiar with the provisional cast on of your choice.


http://knittinghelp.com/dynamic/php/video/index.php?file=/cast-on/invisible-co-rds.mpg
http://www.thedietdiary.com/blog/lucia/581
http://www.knittingatknoon.com/provisional.html
http://www.eunnyjang.com/knit/2006/03/majoring_in_lace_part_iv.html


Got your choice of a provo* cast picked out??

Here we go, a MD scarf with some really nifty edges!!


So your first square is done, notice the red waste yarn along the bottom edge and the first short side of the soon to be scarf.


Here is a closer look.


The next step is to pick up that waste yarn and make some more provo casts. The number to cast on at this stage is equal to the number of stitches for one side of your square, plus one. For example if your square is 20 x 20 you'd cast on 21 stitches, if your square was 10 x 10 you'd cast on 11 stitches. In the pix I've used a square a that is 16 x 16 so I cast on 17 stitches.


Next step is to knit back across the new cast on stitches. Knit back across 16, wrap the CC yarn for neatness, then begin the first row of the new square with YO, K1, YO, K2tog, turn.


Just keep adding squares until you have reached your desired length or have run out of yarn!


Let's pretend the piece in the above pic is a long and lovely scarf...come on guys...do you have any idea how many scarves I have at this point?!? Notice the red waste yarn goes from one short side all along the bottom edge and there are live stitches all along the top edge and the other short side......Yeah, here it is, the trouble spot with this method...look at all those stitches that need to be bound off!!! Yikes!! But the HUGE benefit is that ALL your edges are going to match, so for me it's not really a problem.

PLUS.........all those live stitches....hmmmm...how about working another row right on top of this one? Or maybe underneath it?? And what about putting a nice border around the whole thing instead of just binding off??? Ohhhhh the possibilities!!!

Monika has completed an Add As You Go scarf.....check out her blog...... http://yarnloopie.blogspot.com/
She's such a sweetie, test knitting some things for me. And can I tell you the woman amazes me!! She does such lovely work AND she does it mind blowing fast too!!!!

Now I think is it's time to go back and revisit something I mentioned in another post....the 4-patch. Yep, I think we got enough of the need to know how-to's done so the 4-patch won't be as difficult to work. The 4-patch will be the next post, again for ease of searching for it at a later date.

*provo = my personal short hand for "provisional cast on"


Saturday, November 18, 2006

Plan Ahead MD Squares


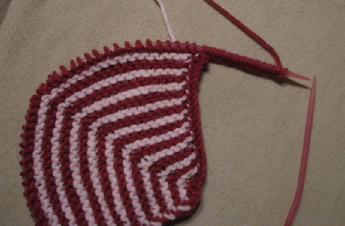
Take a good look at this photo, I need to explain a couple of things.
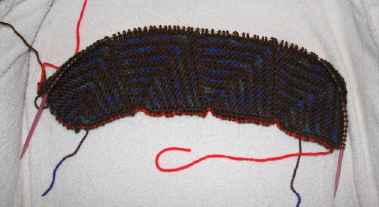
It's a progress photo of the Plan Ahead MD Squares.

To get a photo so it's not all bunched up and can be seen, I had to remove the needle. Across the top you can see a light pink holding thread. At the bottom of the pic you can see some of my needle with a bunch of stitches on it. Notice how nice and smooth the bottom of this strip is compared to the AAYG strip in the previous post. Yeah, that's my kind of edging!! Unfortunately to get this kind of edge you'll need to do a little planning ahead and a some math. It's just a tiny bit of math I promise.

The first thing you need to decide is how big do you want your square. The Simple Single Square pattern is for a square 10 sts x 10 sts we'll use a square that size for now just to be consistent. So let's say you want to make a strip 9 squares long with 10 x 10 squares. You'll need to begin by casting on 109 sts.


Hmmm how did I get that number.....

9 squares 10 sts wide, (90) + 10 sts for the edge of the first square + one center stitch for each square (9) = 109 sts.

Or if math doesn't scare you, use the formula below.
Where:

a = number of squares

b = number of stitches wide

(a x b) + a + b = number of cast on stitches.

Now let begin our PAMDS.

Cast on 109 sts.

(note: I suggest using a knitted on cast as I did for the squares in the photo (or perhaps a long tail cast) this cast on edge will be one short side and the bottom edge of your strip. The bind off will be the other short edge and the top of your squares. Using a knitted cast or the long tail makes the top and bottom look alike.)

Knit back 98 sts, leaving 11 sts unworked.

These ll sts are your center stitch and side edge of your first square.

Begin your square using the SSS pattern Rows 1 -18 with 2 small exceptions.

Omit the "knit 11" of row 1 so it only reads " Row 1: YO,K1, YO,K2tog, turn."

and add a knit 1 to end of Row 18 so it reads " Row 18: Sl 1, Knit 19, K2tog, K2, turn.

From this point on work the SSS pattern Rows 1-18 with the changes in Rows 1 & 18, until you have worked all 9 squares.

EXTRA NOTE: If you are working a two color square, you might also want to consider employing the "Neatness Tip" from the previous post so you won't have the 1/4 inch long floats of the CC on the wrong side.

At the end of the ninth square there will only be one stitch left to knit, knit it, turn. Sl 1, and bind off all stitches.

Your strip is done!!!

Obviously the greatest advantages to using this method for making a strip of squares are once again, the only ends you have are the begin and ending ends and you didn't have to pick up any stitches! Another clear advantage is the nice smooth edge it has.

The disadvantages of this method are that you have to plan ahead, do a little math, and, I don't know about you guys, but I'm not thrilled with casting on a bazillion stitches and having them on my needle waiting to be used.

Using this PAMDS method for a strip of 9 20 x 20 squares (like the ones in the photos above) would be a nice sized scarf (about 60" x 6.75") but to start the dang thing you'd have to cast on 220 sts...um not my cup of tea....so personally I think this is an disadvantage, maybe it's not a problem for you. Being the neurotic and compulsive person I am, I have figured out the ultimate solution that will satisfy my obsession for a neat edge, my desire to just pick-up and start without much forethought, and without the tedium of casting on a bazillion stitches, plus it inherently sets a world of options at the knitter's feet.

Can you guess what the "ultimate" solution is???

Come on you sock knitters.....think about it....

Coming up next...The Joys of the ProvO

Did I just see a flash of brilliant light or do I have another migraine looming? LOL

Add As You Go MD Square

OK boys and girls, the next step from working a single square is to be able to make them in a strip. There are a several ways to do this but I'll only include the 2 methods I think are the easiest and the most versatile. "Add As You Go" and "Plan Ahead MD Strips " each of these have their own variations, benefits and pitfalls. I'll try to keep this as simple as possible.

Let's begin with the "Add As You Go MD Squares" in this post and I'll make a second posting for the "Plan Ahead MD Strips" method so it will be easier to find in the archives.

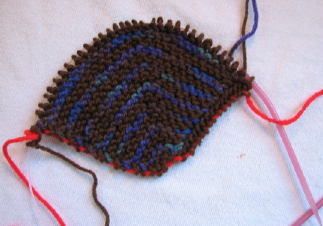
So you've finished your first square....

(To get this striped effect work the simple square by changing colors on every odd row. Cast on with MC work rows 1&2 change to CC work rows 3&4, change to MC work rows 5&6...etc do NOT cut yarn at changes.)

Now you are ready to set the stage for square number 2.
With MC using a knitted on cast make 11 new stitches.

Work square number 2 using Rows 1 - 18 of the Simple Single Square pattern.

At the end of Row 18, using a knitted cast on, cast on 11 more stitches and work another square!

Continue doing this for as many squares as your heart desires. End with Row 18, Knit 1, turn, Sl 1, bind off all stitches.

Neatness Tip:
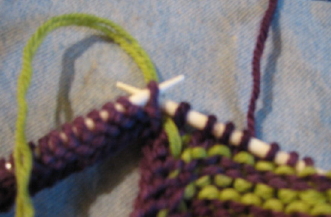
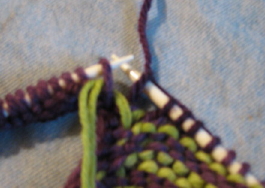
For the sake of being tidy, and not having a quarter inch floating thread of the CC, on the wrong side of the work, after you have knit the first 11 stitches of row 1, wrap the CC around the next stitch before you work the YO, K1,YO of the row. Don't work the stitch with the CC yarn, just wrap it. You can wrap around any way you wish, the photos below are taken from the wrong side, but you can wrap from the front it doesn't matter. This photo taken from the wrong side, shows the CC yarn back and the needles are poised to slip the stitch that is on the left needle. The stitch has been slipped the CC yarn brought forward and the slipped stitch has been returned to the left needle.

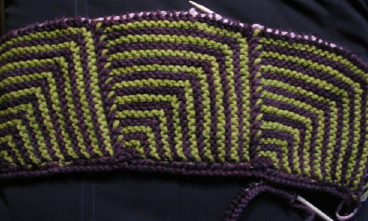
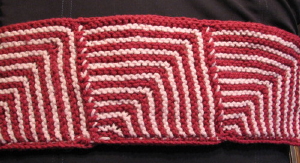
Here is a photo of the "Add As You Go" strip.


The advantages to the AAYG method are that you can just pick up your sticks and yarn and start making a strip of squares. You needn't be concerned if you have enough yarn for 8 squares or 9 squares, work as many as you can and call it done when you run out! :-) Absolutely no math involved at all unless you consider counting your cast ons math! :-) And of course, the greatest advantage of all.....only 4 ends....ever....no matter how many squares long you make your strip!!!

The disadvantage of this method is that the bottom edge isn't as smooth and neat as I like. I have a solution for this but that will come with it's own post. Another pitfall of this method is that it might be difficult to maintain an even tension in your cast on edge and your bind off edge. These tension anomalies make the squaring up of the squares imperfect....that bugs me.

**Disclaimer, yes for those eagle eyes out there. The squares in the photos ARE larger than a square worked with the stitch count called for the Simple Single Square pattern. In the SSS pattern the square is worked 10 stitches wide, and 10 stitches tall with a center stitch. The squares in the pics are 20sts x 20 sts with a center stitch. (41 stitches for the initial cast on and 21 stitches cast on to set the stage for each AAYG square. Using a 20 x 20 square in worsted wt. with # 7 needle I get a 6.25" square...nice width for a scarf don't you think?

Thursday, November 16, 2006

Simple Single Square

As I promised....>

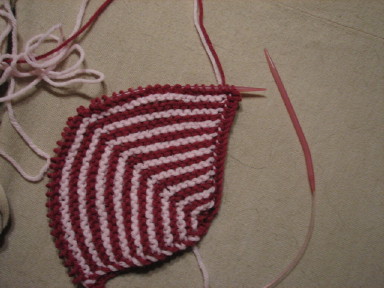
Here is the pattern for a single MD square. Doesn't look like much all by itself, but this little square really packs a punch. Squares made in this manner can be worked together (not sewn together, nor with picking up stitches) to create strips, blocks, or any shape your heart desires.

How To Make A Single Square

Pattern Notes:

Slip all stitches purlwise with yarn forward.

Knit all YO’s through the back.

Cast on 22 sts.
Row 1: Knit 11, YO, K1, YO, K2tog, turn.
Row 2: Sl 1, Knit 3, K2tog, turn. [5 working stitches] (see pattern notes)
Row 3: Sl 1, K1, YO, K1, YO, K1, K2tog, turn.
Row 4: Sl 1, Knit 5, K2tog, turn. [7 working stitches]
Row 5: Sl 1, K2, YO, K1, YO, K2, K2tog, turn.
Row 6: Sl 1, Knit 7, K2tog, turn. [9 working stitches]
Row 7: Sl 1, K3, YO, K1, YO, K3, K2tog, turn.
Row 8: Sl 1, Knit 9, K2tog, turn. [11 working stitches]
Row 9: Sl 1, K4, YO, K1, YO, K4, K2tog, turn.
Row 10: Sl 1, Knit 11, K2tog, turn. [13 working stitches]
Row 11: Sl 1, K5, YO, K1, YO, K5, K2tog, turn.
Row 12: Sl 1, Knit 13, K2tog, turn. [15 working stitches]
Row 13: Sl 1, K6, YO, K1, YO, K6, K2tog, turn.
Row 14: Sl 1, Knit 15, K2tog, turn. [17 working stitches]
Row 15: Sl 1, K7, YO, K1, YO, K7, K2tog, turn.
Row 16: Sl 1, Knit 17, K2tog, turn. [19 working stitches]
Row 17: Sl 1, K8, YO, K1, YO, K8, K2tog, turn.
Row 18: Sl 1, Knit 19, K2tog, K1, turn [22 working stitches]
Row 19: Sl 1, Bind off all stitches loosely.

Tips

There will always be an odd number of working stitches.
YO’s are placed on either side of center stitch on all odd number rows
Color changes for stripes are always done on even number rows, and across a multiple of one even row and one odd row.
If you lose your place, count the number of ridges completed, including the “new” row and work that many stitches, then begin the YO, K1, YO sequence.
If you work with a tight tension, you may want the increase a stitch or two in the corner when binding off, to give it more room to square off

For those who are NOT blind followers and with a nod to EZ:


Short and “Pithy” Directions
Cast on X number of stitches equaling the number of desired stitches for each square width and height, (this must be an even number).Plus one stitch for a center stitch and one stitch for the number of squares desired.


Example:

10 sts wide…….10 sts

10 sts tall………10 sts

Center stitch…….1 st

One square………1 st

______________________
Cast on ………..22 sts

Knit across until the only remaining cast on sts to be worked is equal to the number of stitches tall plus one.
Row 1: YO, K1, YO, K2tog, turn.
Row 2: Sl 1, knit across, K2 tog, turn.
Repeat Rows 1 & 2 increasing one knit stitch after the Sl 1 and before the K2tog in each odd row.
End by knitting last remaining cast on, turn, Sl 1, bind off all stitches loosely.
Remember this sweater from a few posts back?? Using this simple square (and a couple of other tricks...be patient, I'll be posting them) a sweater like this can be made. It was made in one piece with no sewing, no picked up stitches, and only the beginning and ending of each ball of yarn used. (If I remember correctly, I had 12 ends to weave in when I was done making this sweater.

I know I promised the 4-patch block next, and it will be coming, I promise, but I think the next logical thing to show you is a strip of squares, aka, a scarf. Look for it tomorrow. Hopefully the curve balls life has been tossing at me and mine these past two days, will be resolved and I'll be able to do fibery stuff, and get some patterns written up in proper form.
Soooo, next up is a scarf. So easy, sensible, and addicting, I suspect you'll be making everyone you know a scarf for the Holidays!! Go ahead and start picking out the yarn(s) you want to use (no more than 2 please) Included in the pattern will be how to make the scarf with any yarn you want, in any width and any length. I only want you think about 2 things when choosing your yarn. One, if you want to use a highly textured yarn, then you should pair it with a smooth yarn...really, cuz think about it, using 1 fluffy puffy yarn alone or 2 fluffy puffy yarns will only obscure the stitch pattern so why bother working the squares?? (fluffy, puffy stuff wouldn't be my reccomendation for your first project though. You should give youself a break and REALLY know what you're doing when making the squares cuz counting fluffy, puffy stitiches isn't fun, IMHO) And the second thing to consider when picking out your yarn is to use yarns at least simlar in weight. Granted the above pictured sweater used a sport wt. and sock wt...close but not the same. Slight differences in weight won't cuz much of a problem, but you might not like the results with 2 yarns of widely differing weights....then again, maybe you would...hey it's YOUR scarf!!!
Wishing you sweet dreams of lovely almost-mitered scarves with only 4 ends to weave and no stitches picked-up!!
PS I hope all comes through OK, and forgive me if there are spelling errors please. Every time I try to spell check, I get a lot of broken html code and lose half of what I written..............sigh...another curve ball????
BTW I do have the simple single square pattern in PDF form, but I don't know how to post it here, if anyone out there knows how could you tell me?%<>

Tuesday, November 14, 2006

A Single Square

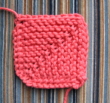
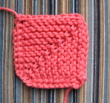
Here are front and back pix of a single MD square.


Pattern will soon follow.

As well as the pattern for a 4-patch block.
Here is a peek at the front and back of the 4-patch.


Sunday, November 12, 2006

Prototype MD Sock

The other day I posted that I was thinking about giving a MD sock a try. I didn't get around to doing it that day, but last night I started one and just finished it. Bear in mind, this is just another experiment so I only took the vaguest notions regarding sizing. I was after the process. I'm THRILLED!!


I worked this top down, which isn't my favorite method. I'm not thrilled with the heel and toe, but I wasn't concerned about them. Tomorrow's sock, if I don't get side tracked, is a toe up version. Then I suppose some other sock types i.e two needle socks. I'm thinking working the design down into a heel flap would be kind of nifty and down (up?) the foot. I need to see which direction the squares face looks best. Ooooh the possibilities!!


The thing that has me swinging from the chandelier is that I used nobody else's technique!!!! That's right MD fanatics, I "uninvented" my own method. Yep, I UNINVENTED it. I, for one, am NOT even going to think that what I created is unique and has never been done before.

Differences between this method and the other that can be found in a book......

It is sooooo much easier!! Don't know about you guys, but to start one of those squares with the other method always irked me. It was so fiddly with all the markers, and not easy to remember. At the start of each square I'd have to get out my notes and markers again. Frustrating for me, breaks up the rhythm and crashes the zone. :-) Once I got going I could work the square without the markers, although I usually used the center one just cuz I'd rather not have to watch for the center stitch.

With this "new" method. There aren't any fiddly parts, IMHO. There aren't any markers, and you can build the next square in 8 different directions!! Yep any of the four sides AND off any corner. You can also change the size of the square. For example, say you begin with a square that is 8 inches, the next "square" you make could be a group of 4, 4 inch squares. Yes, oh skeptical ones, you can!!! And all this can be done without picking up stitches, without cutting the yarn, and without markers. I have run into some limitations, but I'm working on them and with all the things I CAN do the few I can't don't bother me much! :-D

Other things that might keep me from the second sock tomorrow, are other shapes. Yes, a triangle can be worked in the same manner.

Oh yeah, and yet another thing that might get in the way of the second sock tomorrow is the monumental task of editing all my designs that used the old MD technique and rewriting them for this method.

Ooops, completely forgot about having to write a tutorial for this new uninvented method! Looks like that second sock is getting pushed down the list of things to do mighty fast!!!

Tomorrow I'll post some pics of close up shots. Think I'll make a few swatches up using better colors. Probably use just two contrasting solids instead of a solid and space dyed just so you can see the fabric itself and it won't look so busy.

Now I've got a question for you guys....anyone know how to put PDF downloads on my sidebar???? I'm thinking a few freebie patterns, and a tutorial.